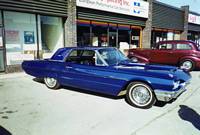
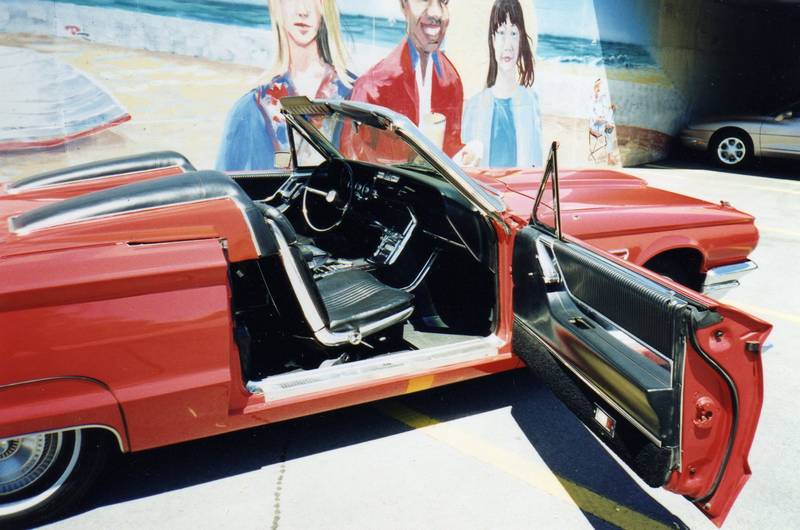
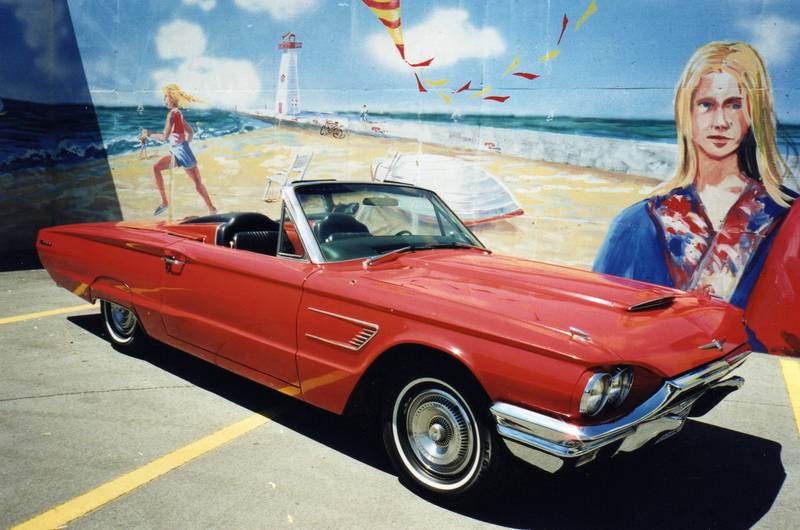
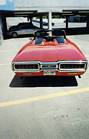
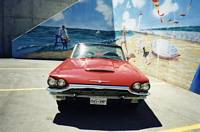
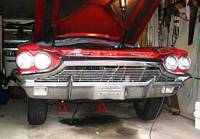
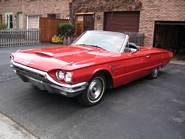
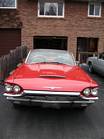
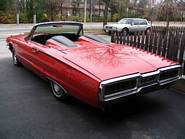
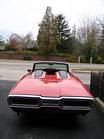
1965 Tbird Convertible, 1994 to present
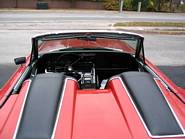
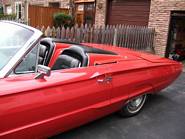
This is a canadian car that was repaired with California panels. I bought it January of 1994, knowing it wasn't the quality of car that the 1964 was; however, the convertible really appealed to me especially with the fibreglass tonneau cover on it. I did very little to the car other than the tonneau caver and new Goodyear radials.
The biggest 2 problems I had when I started driving the car in the summer were fairly majour. First, the top didn't work, even though it was supposed to. After many hours of tracing wiring circuits in the manual, this turned out to be a relay that wasn't connected properly to one of the plugs. The second was power windows that didn't and still don't work. The windows don't bother me as it is a "top down car" both for appearance and driving pleasure. With the top up it looks like any other car.
The car still looks much the same as when I bought it except for a few more scratches and dents. Mechanically it needs a little work which I hope to do this summer before we start driving it.
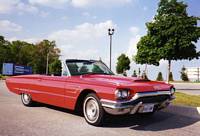

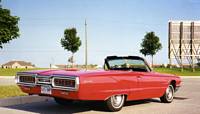
Pictures taken after I added the fibreglass tonneau cover.


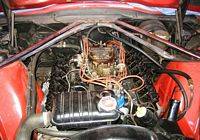
Tbird Engine Swap, April 2005
Last summer I blew the engine in a big cloud of white smoke. It
turned over about 1 1/2 times after that and then seized. Fortunately,
it happened just north of my house and a couple of young car enthusiasts
helped me push it back down into my driveway.
Removing the rocker covers didn't reveal any problems so I removed the
spark plugs and found the number 2 plug gap closed right up. When I
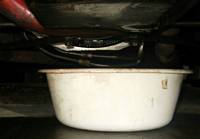
removed the rad there wasn't much antifreeze to drain out. I found
why when I drained the oil. Out came 3/4 of a pail of antifreeze and
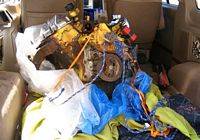
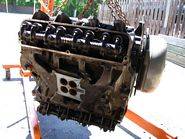
4 litres of oil. I finally found a used 390 cu. in. motor, brought it
home in the back of the Aerostar and started the engine swap in early
April.
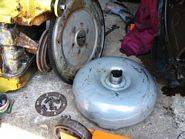
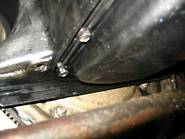
I had planned to pull the engine only and undo the torque converter
from the flywheel, but because the engine wouldn't turn over, I had
to split it between the converter and transmission. The problem with
the engine being seized will also complicate things when the engine is out
because I'll have to remove the pan to see if I can find out how to
un-seize it enough to rotate it half a turn to get the converter and
flywheel off.
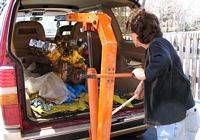
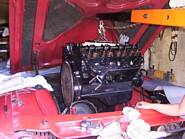
April 11th: Unloading the used engine


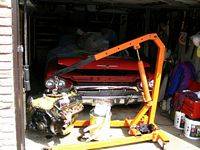
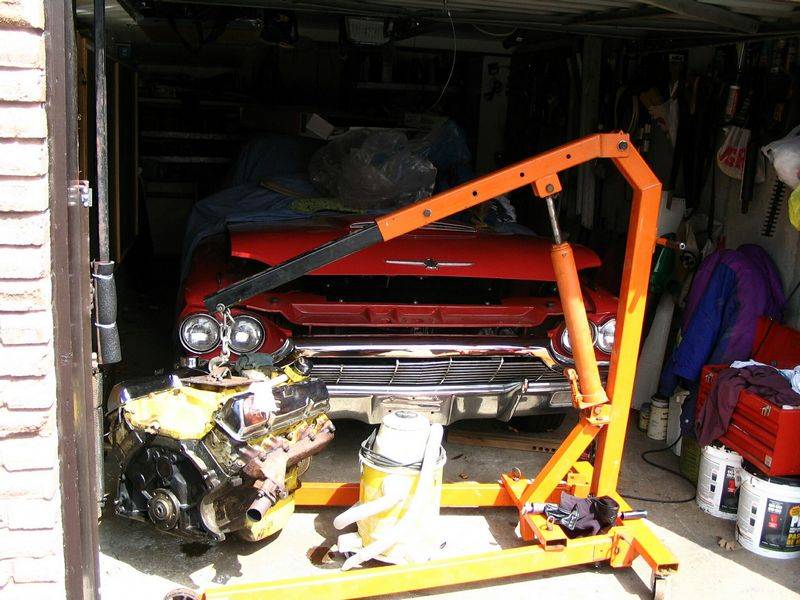
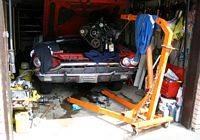
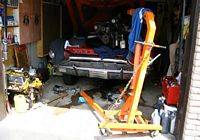
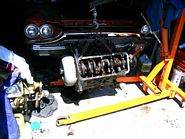
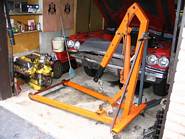
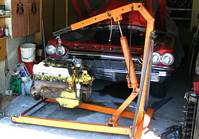
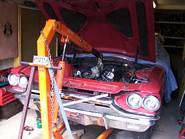
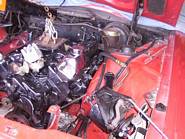
Preparing to remove the engine
It took me a while to figure out why it was so difficult pulling the
engine this time, when previous times seemed so simple. Problem #1 was
due to the extra length of the engine with the torque converter still
attached. PROBLEM #2 is the engine hoist. I have always had problems
with it wanting to tip over, especially when trying to move the hoist
sideways with an engine hanging on it. I've even had it tip over with
an engine on it.
After the engine was finally free of everything, I was still having
trouble lifting it out. This was when I noticed that the one rear
caster was about 6 inches off the ground because the hoist base was
twisting. At this point I lowered it back down so the front of the
pan was resting on the front stabilizer bar. Now it was time to rectify
the twisting hoist with some bracing.
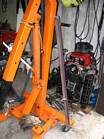
May 11th: The engine is free but ...
The hoist was still twisting. I had taken measurements from the ends of
the rear bar with the casters on it to various points on the upright to
confirm that it was twisting. To firm it up and stop the twisting, I
used a chain and 2 bolts to tighten it up tight enough that it couldn't
twist. This looked ok until the engine was high enough to clear the front
of the engine compartment and be pulled forward.
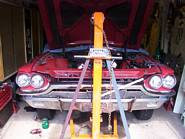
The left rear caster was starting to lift again and got worse as I moved
the engine and hoist away from the car. Now I was stuck with the engine
hoist sticking out past the door opening so I couldn't shut the garage door
and I didn't want to drop it back into the engine compartment. I used 2
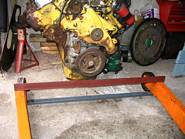
2"x8"x6' boards to support the engine so I could remove the hoist.
I figured shortening the boom now that the engine was partially out might
so I moved it in about a foot. This certainly helped, but wasn't perfect. It
at least let me get it the rest of the way out and on the floor.
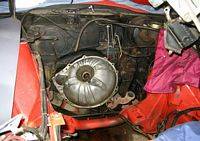
Finally, It's out!
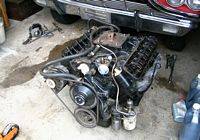
June 1st: The frustration continues!
All the parts have been removed from the old engine except for the torque
converter and flywheel and are ready to be put on the new motor but I am
still plagued with the same problem. The motor will not turn over.
After hooking up a chain to lift the engine from the side,
I took a piece of pipe and pounded the melted piston up into the cylinder
so the the connecting rod was free from the crank. No change!!
I loosened the rocker arm bolts, main bolts and all the rod bolts that I could
reach, hoping this would free up the crank to allow me to turn it 1/2 turn. Still
no movement. This thing is seized tighter than "Toby's A@#$&!E.

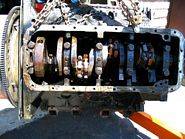
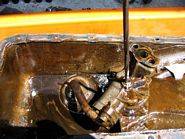
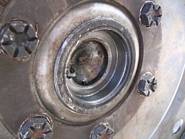
June 8th: Now it's apart and the cause is evident!
I finally found a piece of piston jammed between the cylinder wall and the
crankshaft. I removed the jammed piece and all the other pieces I could get
at in the cylinder. With a large pipe wrench on the crank pulley and an axe,
I was able to turn the crank backwards 1/2 turn, remove the 2 bolts holding
the torque converter to the flywheel and the flywheel.
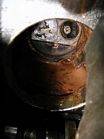
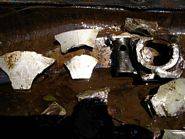
The culprit - a broken valve. These 2 pictures show the valves from the underside
of the head, looking up from the crank. You can see the head is still on the
valve on the left, but only the stem is visible on the right valve. The head
of the right valve broke off.
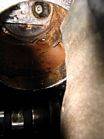
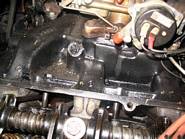
You can also see where the cylinder wall is broken out if you look down from
the valves. What you see is the outer wall of the block for the water jacket
that surrounds the cylinder where the coolant circulates.
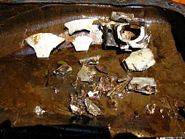
On the left are all I could find of the piston rings and the cylinder wall.
On the right is the top of the piston viewed from the bottom and a piece where
the wrist pin attaches.
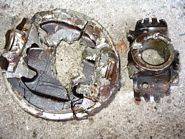
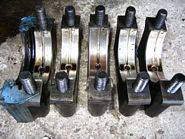
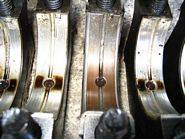
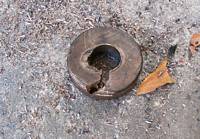
The left 2 pictures show the main bearings. Note the centre one is worn
down to the brass.
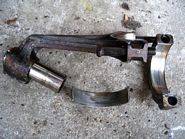
The right picture shows how the connecting rod was bent at a 90 degree angle,
with the wrist pin still attached.
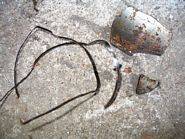
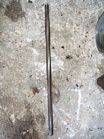
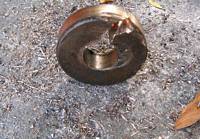
These pictures show how the rod that drives the oil pump is twisted in a
spiral after the oil pump seized, probably from a piece of broken piston. When
I have nothing else to do I'll take the oil pump and the filter apart to see how
much debris is in them.
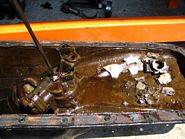
This is what is left of the piston that I scooped up from the oil pan.
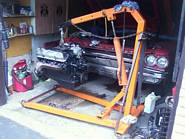
August 22nd: The bracing is done on the engine hoist, BUT.....
I finally got around to making the braces for the engine hoist and thought I had accomplished a lot, but I hadn't counted on Murphy helping me. Everything went fine until I finished cleaning up and moved the hoist back into the garage to pick up the motor. Guess what? The front braces will have to come off to allow the legs to slide under the motor so I can pick it up, then I will have to put them back on again. Time to quit!!
August 24th: Now it's on the hoist.
Everything looks solid and straight. I bolted the flywheel on while it was suspended about 8" with no problems. Now to change the oil pan (the one on the new used engine is dented in on the bottom), bolt the starter on, add the carburetor, fuel pump, plug wires and see it I can get it running on the floor before putting it in the car. I guess a compression test would be a good idea before starting it.
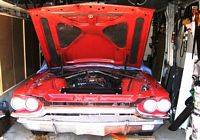
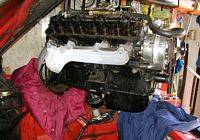
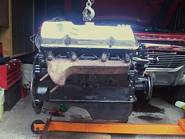
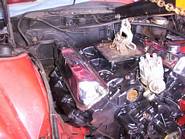
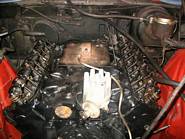
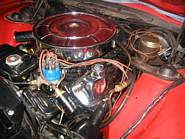
August 31st: Painted and ready to drop in.
Again, things didn't go quite as planned. I wasn't satisfied with the clearance between the oil pickup and the bottom of the pan so I increased it. After I bolted the starter on, it wouldn't turn over. Just a lot of sparks. When I took it off, same thing. So, the plan changes again. I'll get it ready to drop in and get it running in the car. The engine turned over OK using a breaker bar on the crank pulley with the spark plugs out.
I changed 3 frost plugs, a coolant drain tap on the block, heated the exhaust pipe studs and removed the nuts, scraped and cleaned the engine and painted it black, the correct colour for a Thunderbird motor.
Now it's painted and ready to be installed.

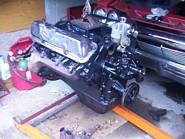
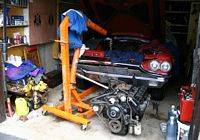
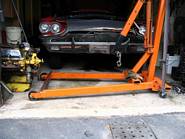
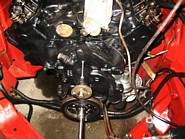
September 1st: Sitting in the car but still supported by the hoist.
The engine looks pretty close to being lined up to the bell housing. The car will have to be jacked up a little so I can slide under it to move the engine into position, while Pat helps up top and adjusts the hoist. The braces I added worked well as the hoist appeared to be very stable.
September 2nd: I wonder what the value of scrap metal is??
It's out, back in, but has to come out again!! We had a lot of trouble getting the engine lined up with the converter. I got the 2 lower converter nuts on and 2 bell housing bolts in but it wouldn't come together. Something was stopping it. I wondered if the flywheel was on backwards so out came the manual, then the engine. After taking it off and sliding it on the converter, I could see it was on right.
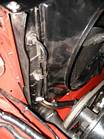
While the engine was out I changed the chain that it was hanging on from the hoist so it lined up better with the bell housing. As you can see in the 1st picture, it is hanging sideways instead of front to back. Still no go!
Now it's coming out again. This motor had a standard transmission on it and I have a feeling something is wrong on the crankshaft. The pilot bearing is still in the crank, as seen in the 2nd picture, and now I think I remember there being a round centre on the converter that would fit into the crank if the pilot bearing was removed. Now I need to roll the old engine over and look at the old crank to see if my suspicions are correct.

September 28th: I pulled the engine again, last time I hope.
A couple of ideas I had to get the pilot bearing out didn't work. It's actually a brass bushing, so I decided to drill 3 holes from the centre out and then use a punch to compress it where I drilled the holes. This made it just loose enough that I was able to wiggle it out by hand. Now it's ready to go back in. The hoist seems to be working well since I added the braces.

October 24th: It's in and bolted up at last!
This time it went back in very easy. I decided to put the oil filter and housing, fuel pump and motor mounts on before I put it back in. The motor mounts may have been a mistake as the motor was now a bit high at the front. To compensate I jacked up the front of the transmission on the bell housing and moved the chain supporting the engine from the hoist a little towards the front of the engine. This looked like the right angle and when I crawled under the car, one bolt of the torque converter was in the hole of the flywheel and the other was out by only 1/16 inch.
Pat twisted the motor from the top while I did the same from under the car and BINGO, the first bolt went in on the bell housing. After the 2nd bolt went in on the bell housing, I put 2 of the nuts on the torque converter, then the remaining 4 bolts for the bell housing. Pat turned the motor over 1/2 turn so I could put the last 2 nuts on the torque converter.
We disconnected the engine hoist and cleaned up the old, oil soaked kitty litter from under the car, then I jacked it up higher and put a second jack stand under it. Now I can finish putting the rest of the parts on, starting with what is required to start it up.
October 26th: It runs, but it wasn't easy.
I wanted to get the motor running as soon as possible, so on went the starter and motor mount nuts from below. Now I could let it down off the jack stands so it would be easier to work on the top of the motor.
This seemed like easy going now putting the carb on, connecting the linkage, battery cables, coil, and adding oil. I planned to use a remote starter button and hot wire the coil directly to the battery. This way I wouldn't be running back and forth to turn the key on and off. Oil pressure was a main concern so I hooked up a mechanical gauge under the hood. Before putting the cap and plug wires off my old engine on the distributor that came in the new motor, I turned the motor over with the remote starter button, then hot wired the coil without the cap on to see if I had spark at the points and it was a go.
Things seemed to be going well so I checked the plug wires in the cap just to make sure they were correct and was ready to fire it up. Since there was no gas in the carb, I primed it with gas in a dish washing soap bottle, hot wired it and hit the button. It turned over but gave no indication of firing.
Just to make sure, I did the basic timing with #1 piston at top dead centre on the compression stroke, made sure the timing mark on the damper pulley was lined up with the pointer and that the rotor was pointing to #1 plug wire. Everything looked fine. I spent a lot of time on this and finally decided to check if #1 piston was really at TDC when the timing marks were lined up. It wasn't!
After pulling the spark plugs so I could turn the motor over with a breaker bar on the damper pulley, a friend pushed a piece of vacuum hose down into #1 cylinder while I turned the motor over and he checked for TDC. We did this several times and got the same results. The timing marks did not line up. They were out by 5 inches. This seemed like a lot when the pulley is 21 inches in diameter. This made the timing mark out by .238 of a turn, almost 1/4 turn of the crankshaft.
So now the problem is: What is causing the timing to be out? The easiest thing to try was to assume the timing mark on the damper pulley was out of position so I made a new mark with a yellow crayon and did the timing set up all over again. More gas down the carb, hot wire the coil and this time it coughed a little. Adjusting the distributor timing while cranking it over finally brought it to life. With no coolant in it, I only let it run 5 or 10 seconds. In all the excitement, I forgot to look at the oil pressure gauge, so, we fired it up again and it got up to about 30 lbs before shutting it down.
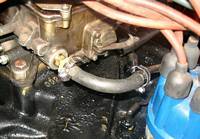
Now 2 new problems appeared. The gas line was leaking at the carb. This was an easy fix by cutting the fitting off the fuel line, installing a fitting in the carb with a nipple on it and connecting it to the fuel line with a 3" piece of rubber fuel line. Transmission fluid was leaking from a split line at the bell housing. It also appeared to be leaking from the front pump seal. Not good. I'll tackle this problem last.

October 27th: Back again for more punishment.
I was curious to see if it would start without touching anything. One pump of the accelerator and it started right up. Good news. Now to get the cooling system working.
The transmission lines had a joiner under the bell housing so I disconnected the fittings and joined them together with some rubber fuel injector hose as a temporary fix. I'll leave this for a while as I'll have to put the car up on stands to get enough room to get under it and fix the lines properly.
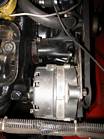
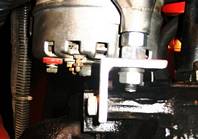
The water pump on the new motor had a stud in place of a threaded hole so off it came and on went the old pump. The power steering pump was next after re-positioning the coil and bending the dipstick to fit around the pump. When we started to put the alternator on, I couldn't find the hole in the block for one of the mounting bolts. After examining the old block I concluded the new block did NOT have the same hole. I was told the motor was out of a 1962, so I figured it had a generator, not an alternator and used a different mounting. Problem number three was making a new alternator bracket.
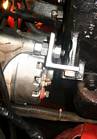
I made a bracket to bolt the alternator to a different spot on the head. I used a 2" piece of 1/4" thick angle iron to make a new bracket. The original spacer was too long so I used 2 nuts drilled out to slide over the bolt and 1 washer. The bolt was too long with this new bracket so 1/2" had to be cut off.

November 3rd: Two problems fixed, the 3rd temporarily patched.
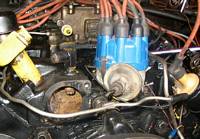
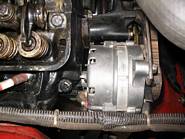
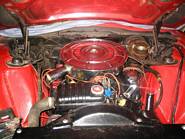
The alternator looked like it was lined up properly and turning the motor over didn't show any signs of it being crooked. I removed it to connect the wires and re-installed it with the belt and power steering belt. Next was the coolant overflow tank and thermostat, rad, transmission cooler lines, hoses, shroud, fan and water in the cooling system.
This motor had a plug in the intake manifold to supply vacuum to the power brake booster and transmission so I had to switch the vacuum tee from the old motor to the new one. I figured it was time to put the rocker covers and air cleaner on to complete the job.
Now I started it up using the key, checked that the gauges worked and let it run without worrying about it overheating, but I could only run it for less that a minute because of the exhaust fumes that get into the house.
I guess this concludes the engine swap as it seems to run and start well with no obvious problems. The only problem left is to fill the transmission and see what happens. There are a few other repairs required before it is road worthy so hopefully we will be driving it next summer.


November 21st: The swap is complete.
After connecting the exhaust pipes, patching one of the transmission lines and adding 5 litres of ATF I was able to drive it out of the garage. It's not ready for the road yet, but close to it. I need to look at the rear brakes as I suspect there is a problem there.
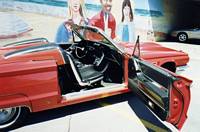
1964 Tbird Hardtop, 1989 - 1994
This was truly a rust free California car that had appeared to have been garage kept. I purchased it late summer of 1989 and sold it January of 1994. It had a new base/clear coat paint job using 1988 GM 23 blue. Other than that, the car was pretty original. During the time I had it I won quite a few prizes at car shows and attended a lot of car cruises.
I replaced the interior, carpets and trunk mats, detailed the engine compartment, had the exterior chrome re-done the December before the GST tax came into use and found 2 new polyester tires for the front to match what was on the rear. It was equipped with air conditioning that worked great after I had it re-charged. I did some mechanical work such as shocks, brakes, steering parts and an alignment. I found fender skirts in Buffalo and had them painted with matching paint that was given to me with the car.